We are finally on our last room of installing new flooring in the house - woo hoo! We were all ready to tackle it this weekend when we ran into a bump in the road. We needed a transition for the floors that lead to the basement stairs... and unfortunately that transition had to be special ordered from Home Depot and wasn't going to get here until the 15th.
Thankfully, earlier that week I had gone to Home Depot and picked out
tile to use on our fireplace hearth. My mom and I had originally planned
to work on it while Chris was installing the wood floors in the room,
but it worked out to our advantage since the demo of the original hearth
took an entire day!
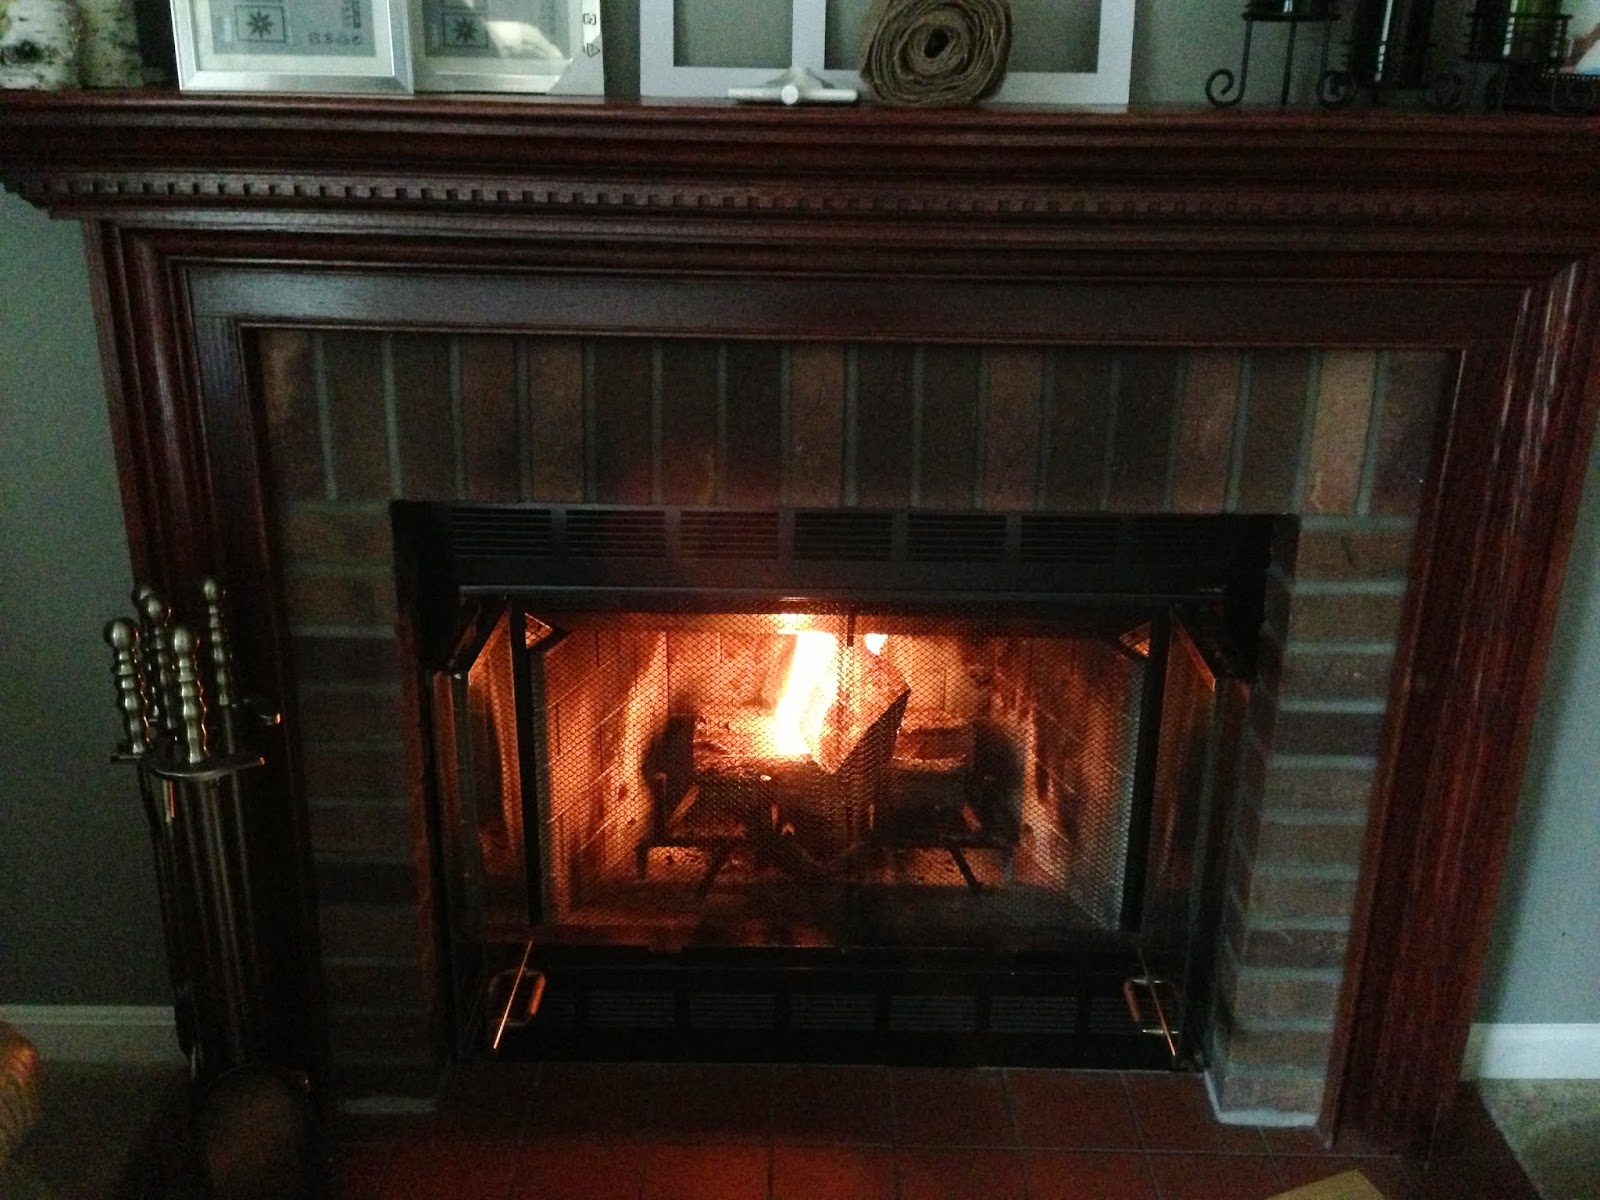
Here's a throwback to our fireplace (pre-Lucas updates)
And one with my handsome hubby after we lit that sucker up for the first time!
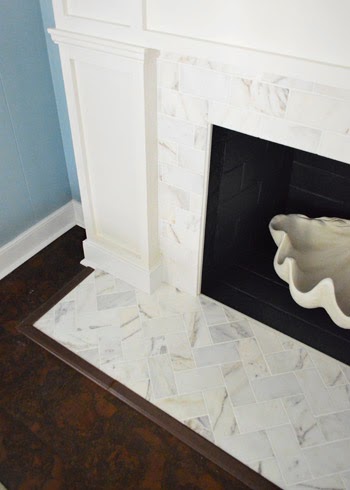
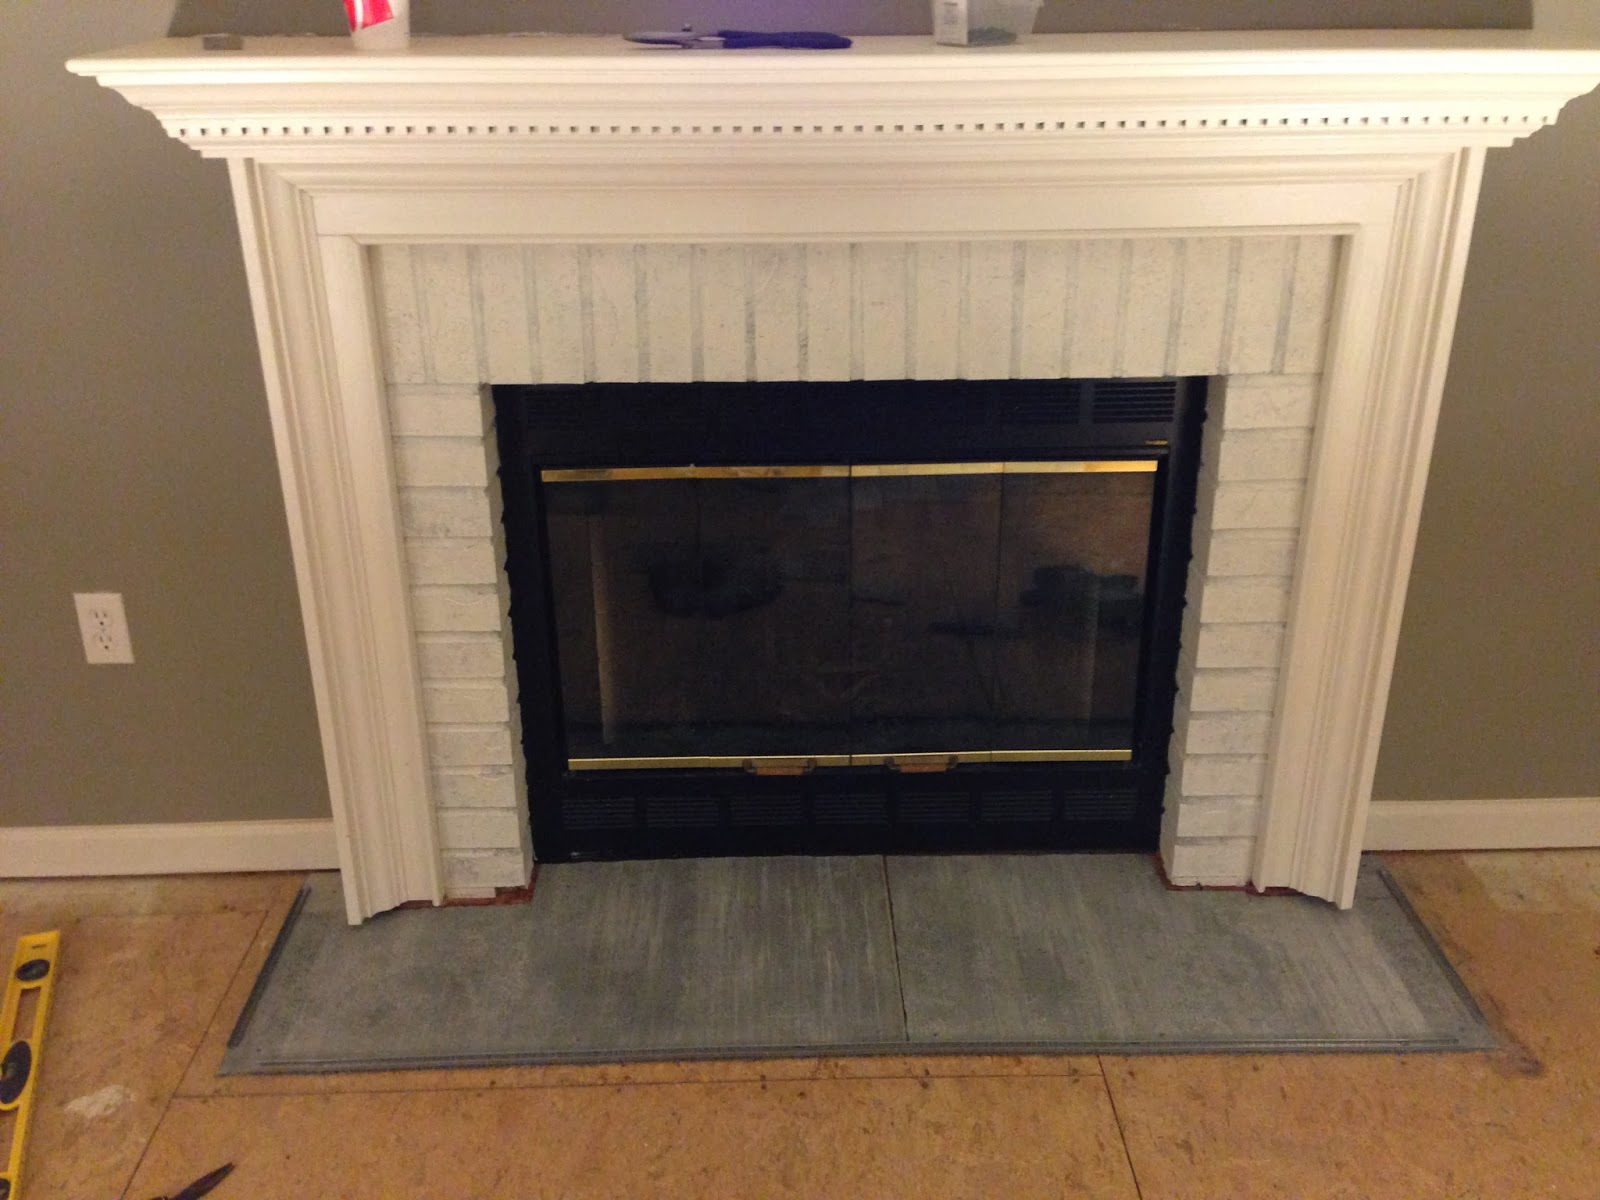
And here is how we last left it. I painted the mantle the same white (BM white dove) as our kitchen cabinets in the adjoining room (you can see them peaking through in the mirror) and also painted the brick. I did two coats on the brick and wiped it with a towel in a few places so it didn't have a thick solid coat. I liked that it had a bit of a white washed feel.
Two things still aren't working for us: 1) the gold on the doors and 2) the red red brick hearth
When Young House Love posted their fireplace makeover, I instantly pinned it to my Pinterest board. I loved the herringbone pattern and the marble subway tiles were available at our Home Depot! Unlike them, we demoed our existing hearth - rather than just tiling on top (theirs was linoleum and ours was tile).
I didn't take many photos of the actual demo process, but just imagine Chris hacking away at the hearth that was laid directly on top of our sub floors with a crowbar and hammer. Not fun.
Once the old hearth was ripped up, my mom and I measured the cement board to the correct dimensions and Chris screwed them to the floor. We also added the transition track for the new floors directly onto the cement board since our floors float and this ensured everything would be level once the floors were installed.
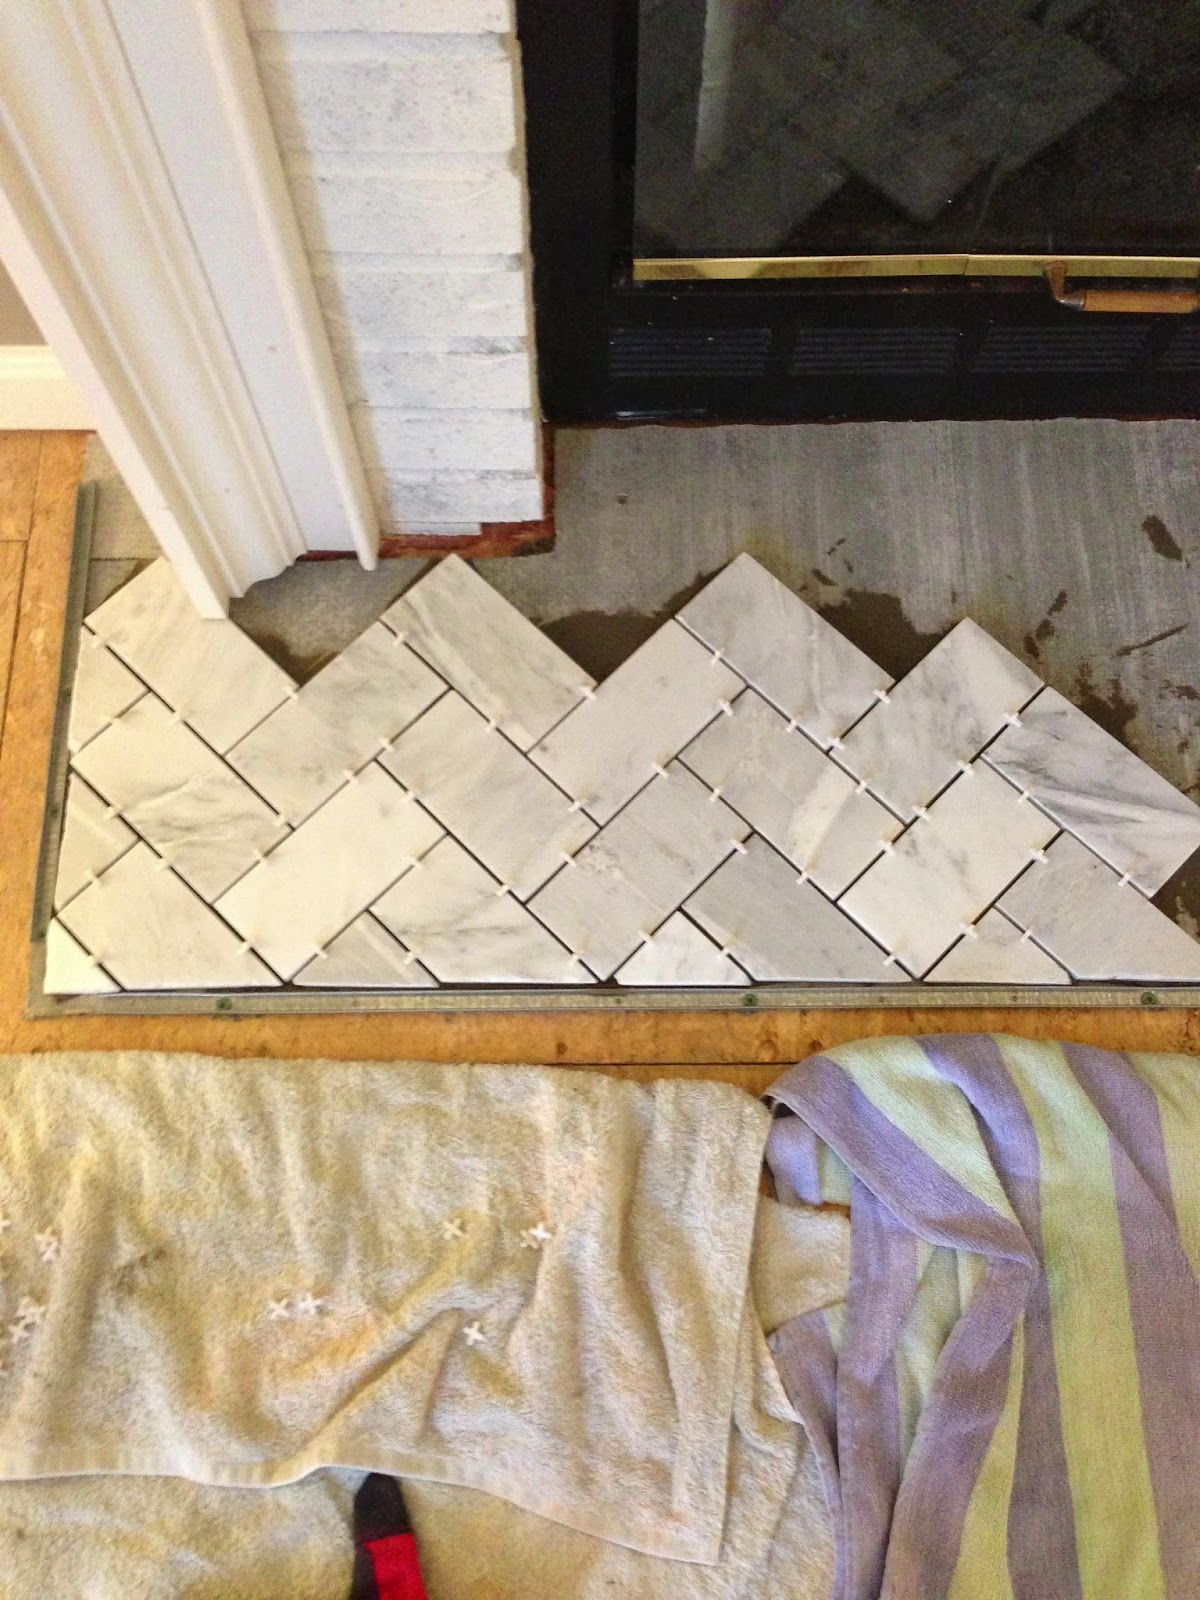
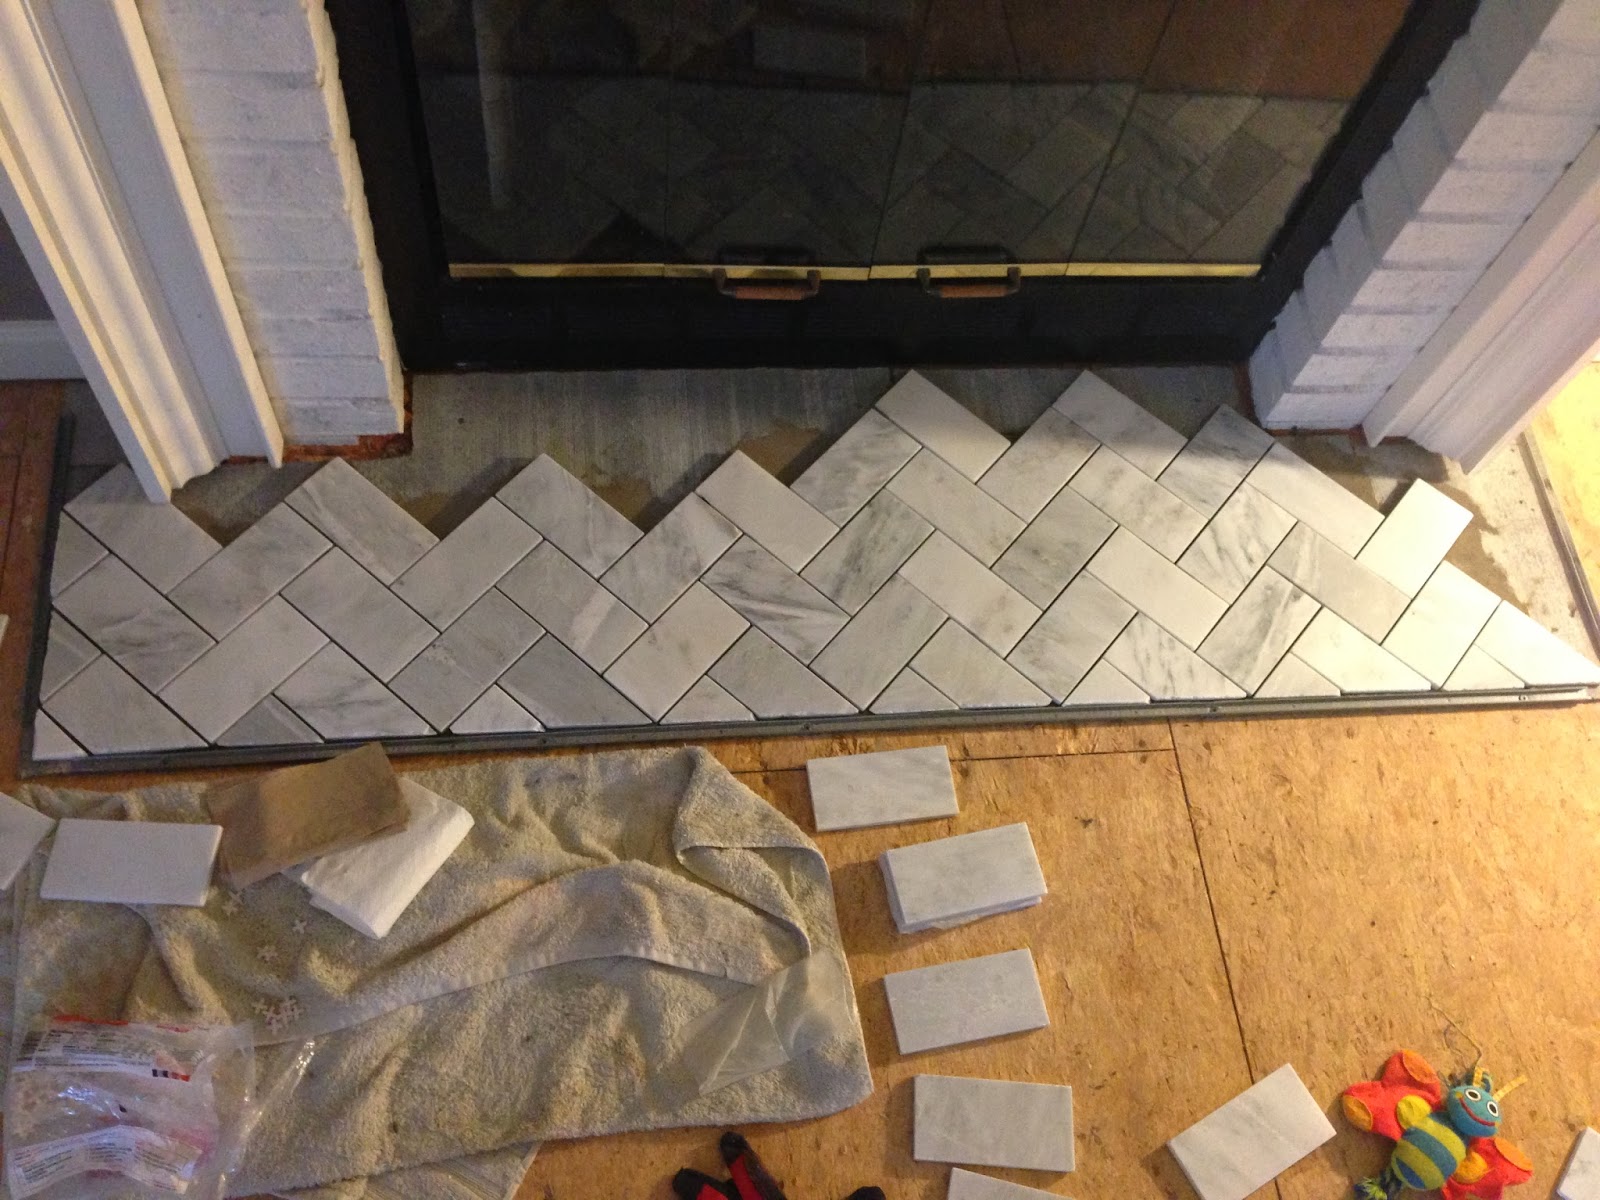
The next step was exciting! We laid out all of the tile from the boxes and started dry fitting the tiles in place and making sure we had a good variation of color. Although we had to move all of these pieces before getting started and trying to put them all back in the same place was frustrating, its definitely a step you don't want to forget. This ensures you have enough tile to complete the job and also gives you an idea of the tricky cuts you need to make. Chris had to cut the bottom of the mantel so the tiles would fit underneath.
My mom made all of my cuts, while I laid and measured everything out. We used quick-set mortar and I made sure to use spacers when laying everything out. I bought natural gray grout because I wanted the herringbone pattern to really pop - which meant my spacing needed to measured.
Laying the tile went super quick once I was able to use full length tiles.
I "back buttered" the remaining tiles in place which worked really well and used a piece of paper the size of a full tile to act as a template that I could fold into the shape of the tricky pieces. Once I had the paper folded to fit, I traced the shape I needed on a tile so my mom could cut it to size.
Again - spacers were my friends for this! Next up is grout, floors, trim, caulk, spray painting the doors (later?) and any touch up painting to the walls.
Little changes like this really make our home feel more like "us" and it's also really exciting and a huge sense of pride to know we have done so much to this house to make it how it is today.
I couldn't have done this project solo - Chris was awesome with the demo and my mom was awesome with cutting the tile! I'm super thankful I have both of them to help me with my crazy ideas!


2.jpg)
.jpeg)
.jpeg)
.jpeg)

.jpeg)
.jpeg)
.jpeg)